Instead of creating users one at a time, you can upload many users in one go, saving time and effort. The major steps are:
- Gather the user info you want to upload in a spreadsheet
- Save it as a CSV
- Upload the sheet
- Match columns in SafetyNow to your spreadsheet
- Save the upload
We'll go over these one at a time.
Creating Your Spreadsheet
Creating a user upload is very simple. There aren't any complicated formats you need to know, or specific naming structures. At the bare minimum, all you need is a unique user ID and a name. However, you can also add as many custom columns as you want and make custom fields to fit that information. At the end of this article is a sample csv you can use to build off of. We've also pictured it below:
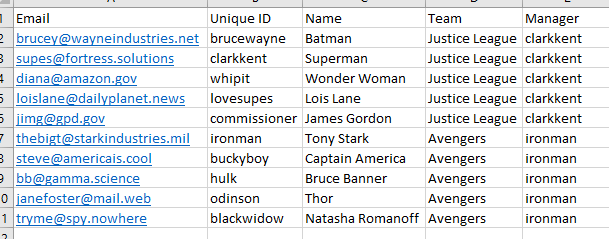
As you can see above, we've included email addresses for everyone, given everyone a "Unique ID," or username, and included the custom field for "Team." Please disregard the "Manager" column, as this is not applicable to CSV uploads.
You can also choose to leave out the unique ID and just use Email addresses as long as everyone has an email address.
Save this file you've created as a "CSV" file. That will allow you to upload it into SafetyNow.
To get started, we'll need to get to the Manage Users screen.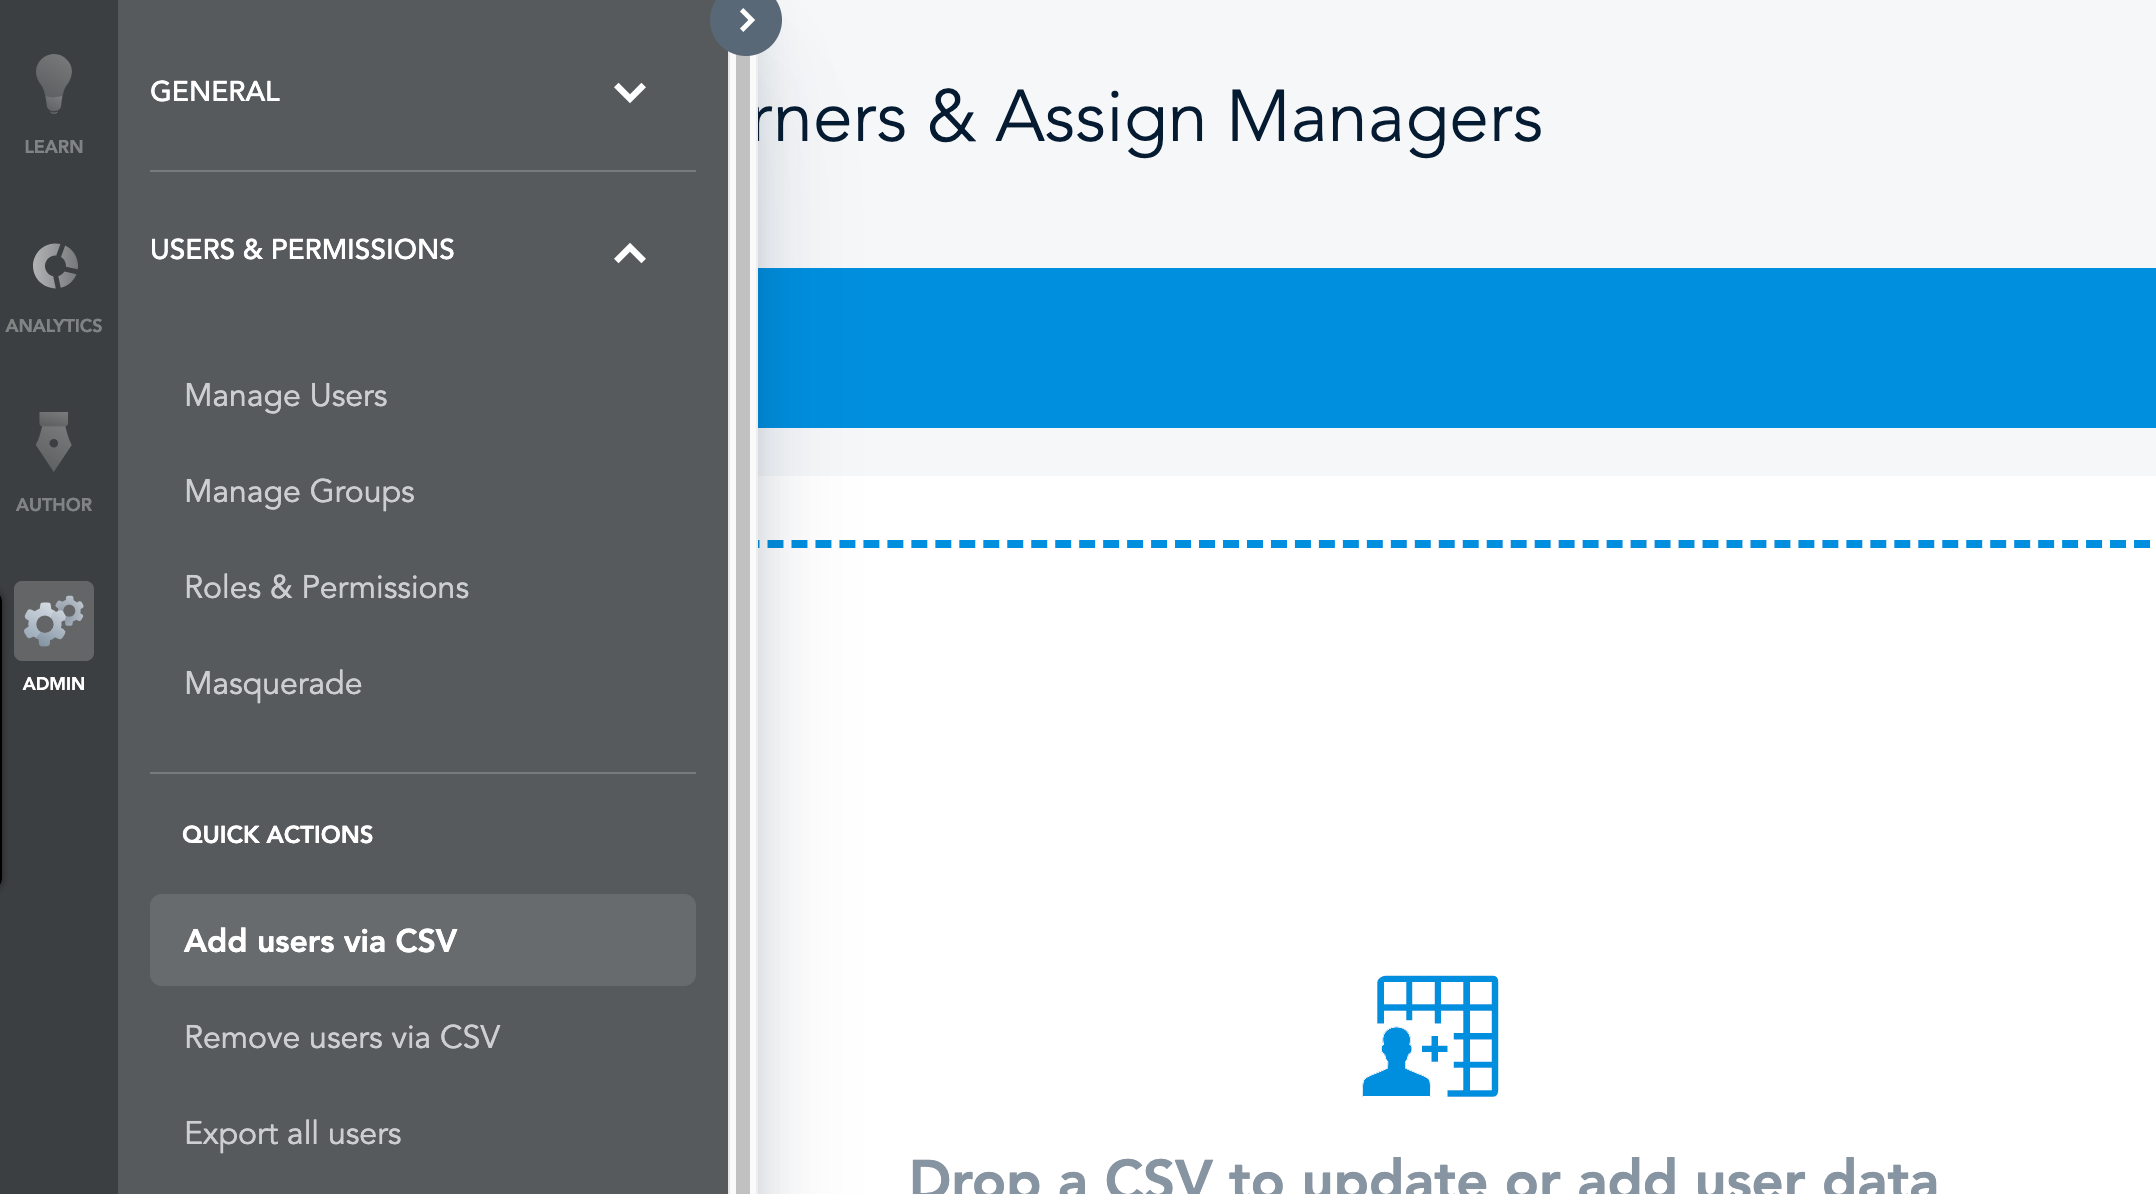
First, navigate to the Admin section using the Application Switcher. From there, click on Users & Permissions and in the menu that appears, click Manage Users.
From here, click Add via CSV either through the admin panel or as pictured below:
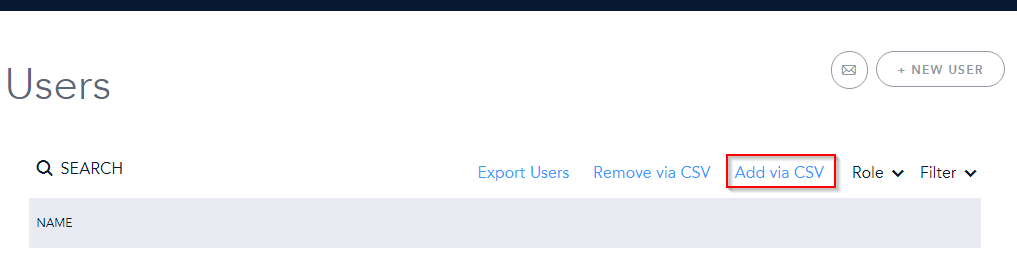
This will bring you to a new screen. Click "choose a file" or just drag your CSV onto the window. That will upload the CSV and allow you to start matching columns to fields.
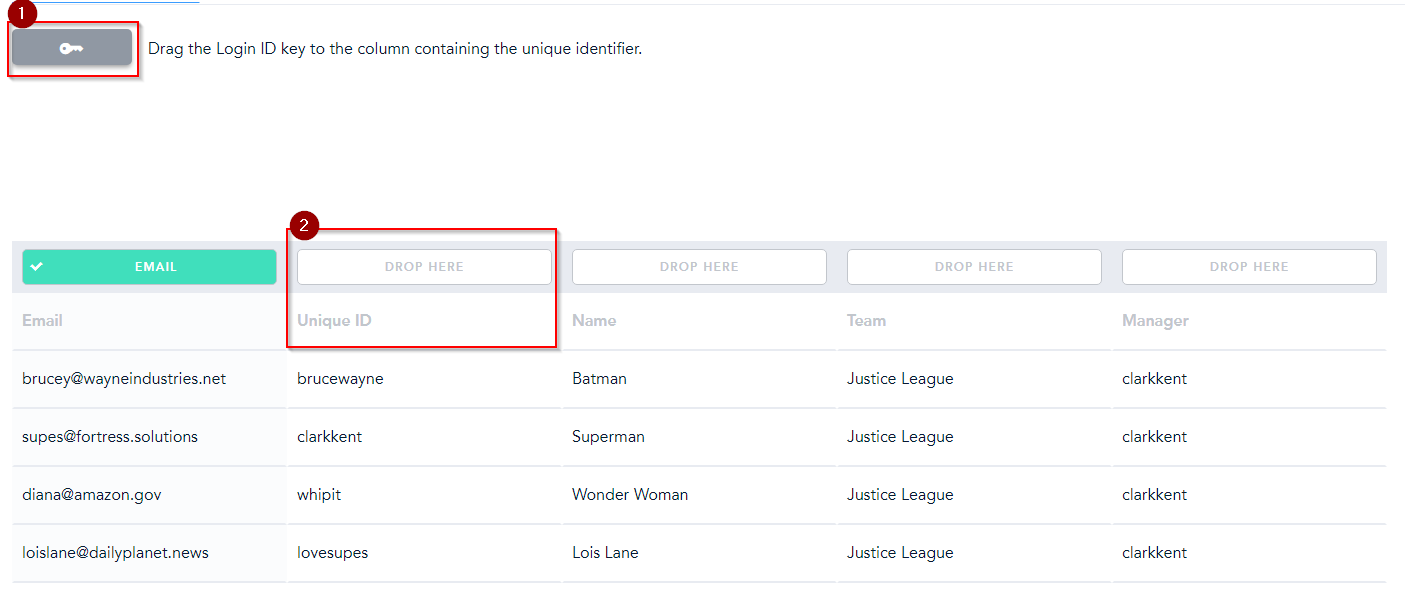
The first step is to drag the Login ID Key [1] to the field with your Usernames [2], or to the email field if everyone has an email. Just click and drag it to the top of the appropriate column.
Next, you'll be asked to drag the Manager ID Key to the appropriate column. Please skip this step, by clicking the blue "Next" button in the upper right corner, or by clicking on the "3 Add Other Data Fields" button, as shown below.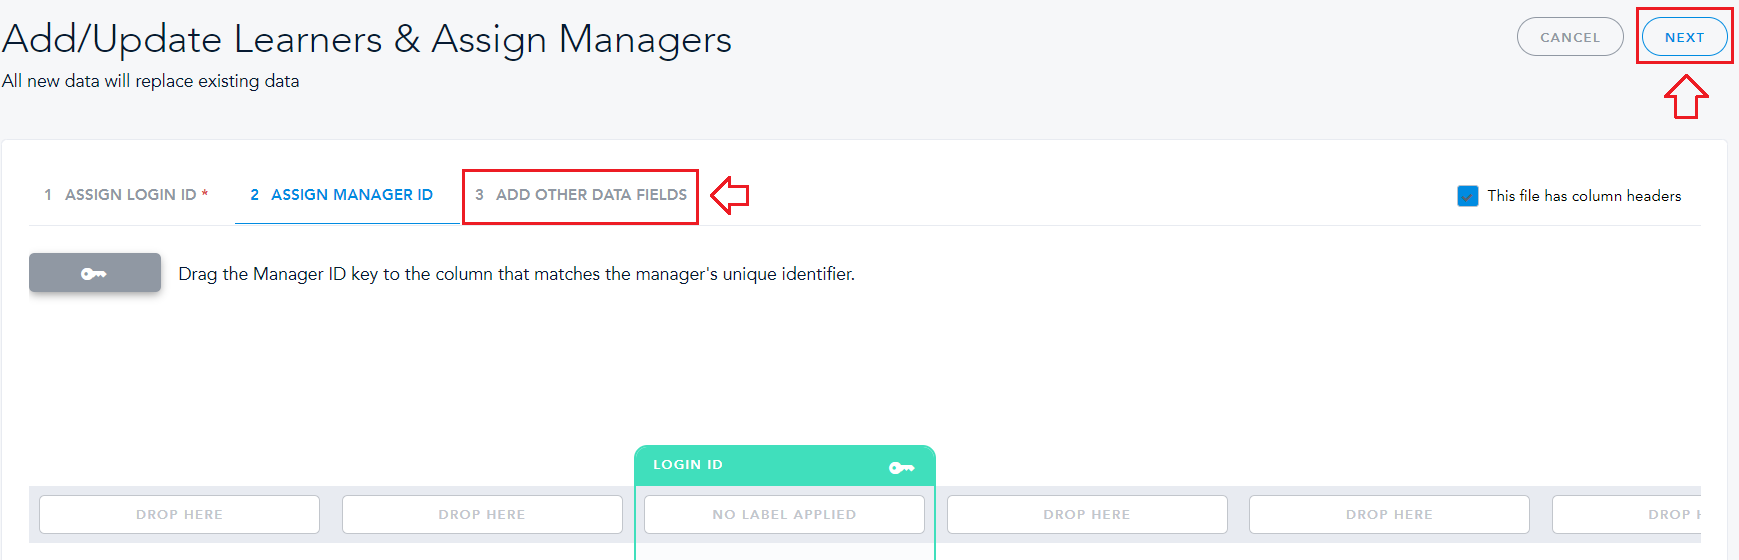
Now it's time to match the rest of the columns to the appropriate fields. For existing fields, simply drag the names over to the appropriate columns. It should end up looking something like this:
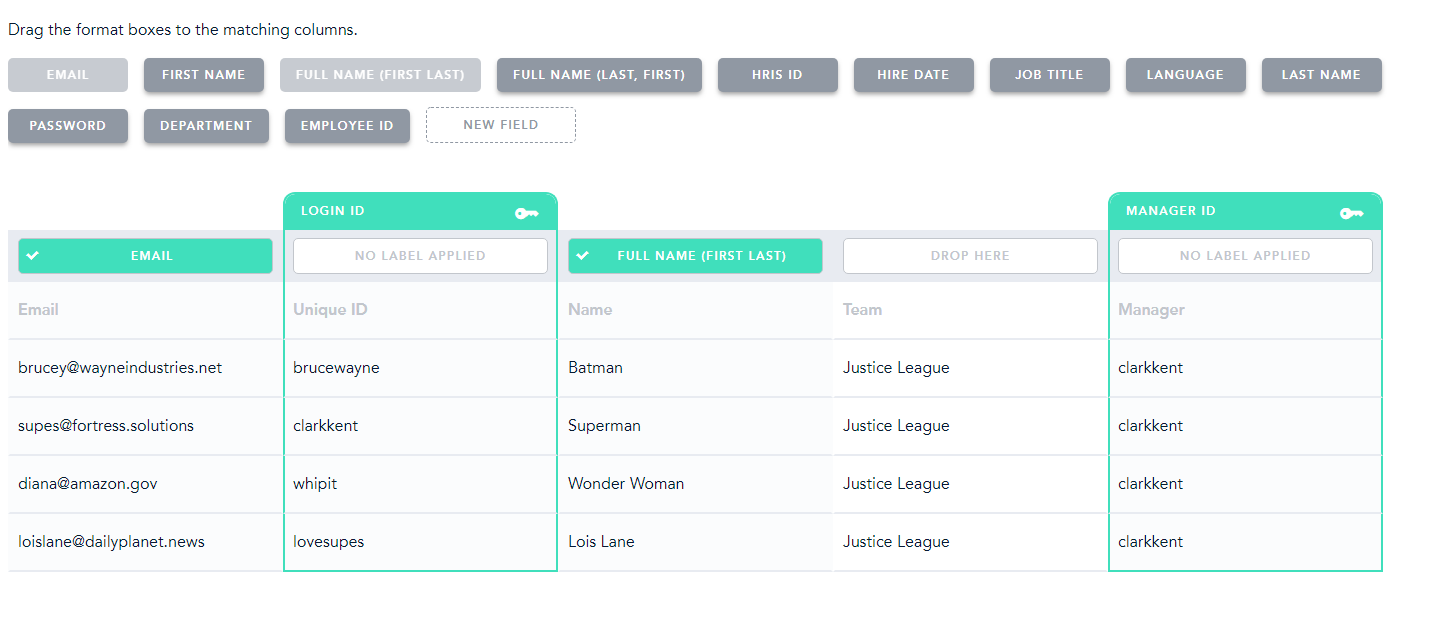
However, we don't have anything for Team. That's okay, we can just create a New Field! First, click New Field, then type in the appropriate name, and finally drag it over to the correct column, as seen below: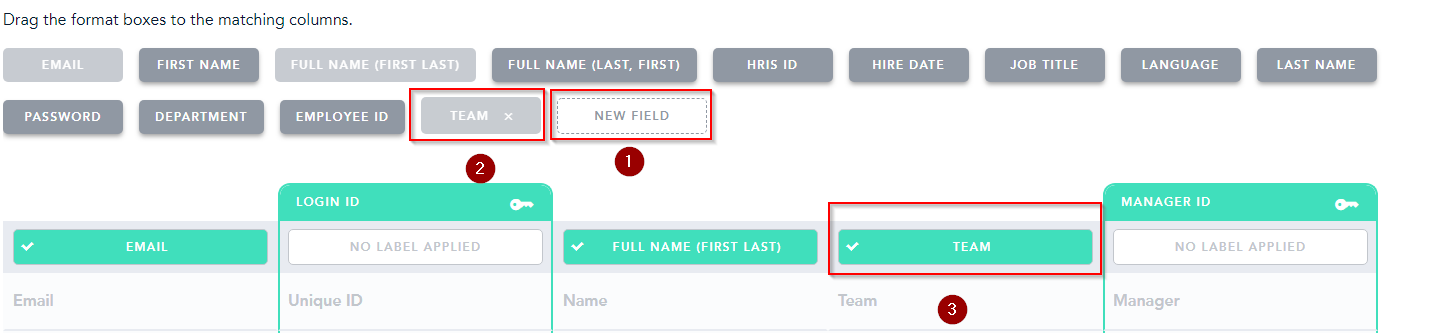
When you're done, click on Finish in the upper right. That will bring you to a summary screen, which will show you how many users will be uploaded or modified, and any possible errors. You shouldn't have any errors, however, so if you do, please contact us.
To finalize the upload, click Confirm.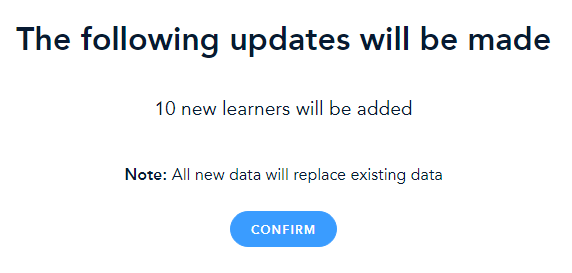
And that's it! Your users will be created, or modified if they already existed. If email notifications are turned on, each of them will also receive an email letting them know they have a new account.
Was this article helpful?
That’s Great!
Thank you for your feedback
Sorry! We couldn't be helpful
Thank you for your feedback
Feedback sent
We appreciate your effort and will try to fix the article